Learn how to add categories on WordPress today. It’s never been easier to organize and categorize your content. With this step-by-step guide, you will know how to add categories in no time. When I started my first site, I didn’t add categories, so I couldn’t keep track of my content, and people couldn’t get through the maze of blogs I wrote.
WHAT IS A CATEGORY ON WORDPRESS?
A category is a way of grouping content on WP. Let’s say you have a personal blog where you’ve written blogs about different countries you traveled to, foods your tried, or experiences you’ve had. On WordPress or any other website builder tool, you can group these blogs into different categories and show your content in a very organized way. This helps your readers to find content faster and more efficiently.
Categories organize the website
By having an organized page, your readers will be able to find what they are looking for quickly and easily. This will keep them on your page longer, and they are more likely to come back in the future. By providing them with exciting and interactive content, you increase the chances that they will want to come back and see what else you offer. You are also building a relationship with them, which is essential for any business.
Example of a Category

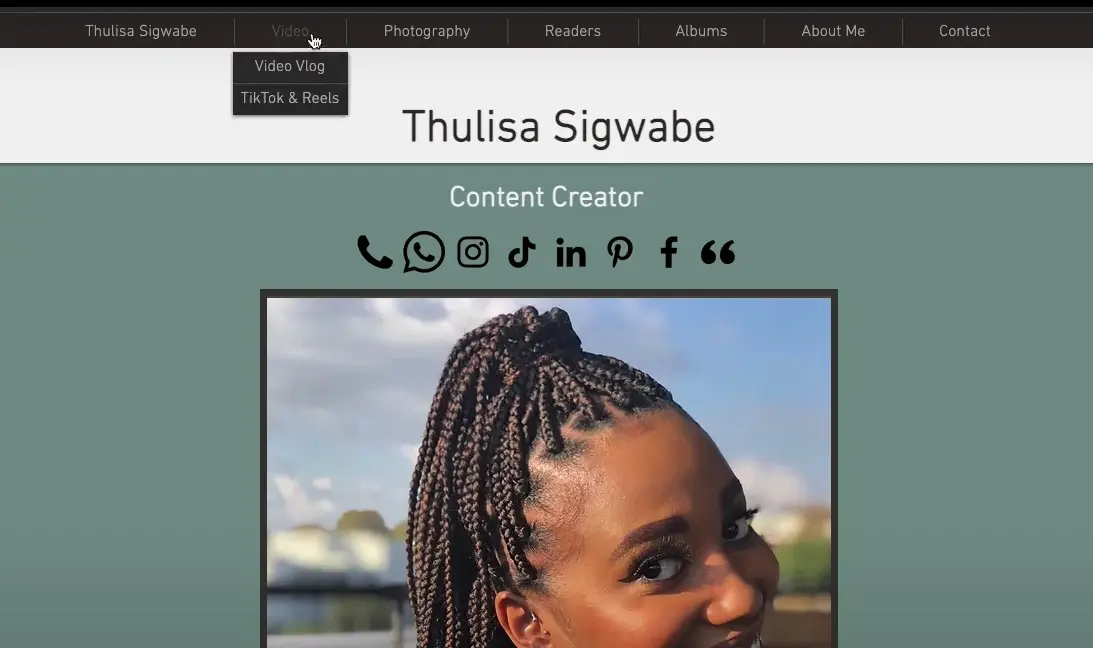
For example, here’s a website with multiple categories. It’s got Video, Photography, Readers, Albums, About Me, and Contact.
If you click on the video, you will see that it has a subcategory called Video Vlogs and Tiktok and Reels dropdown.
So, this is an example of what a category looks like on a website once it’s published.
How to Add Categories?
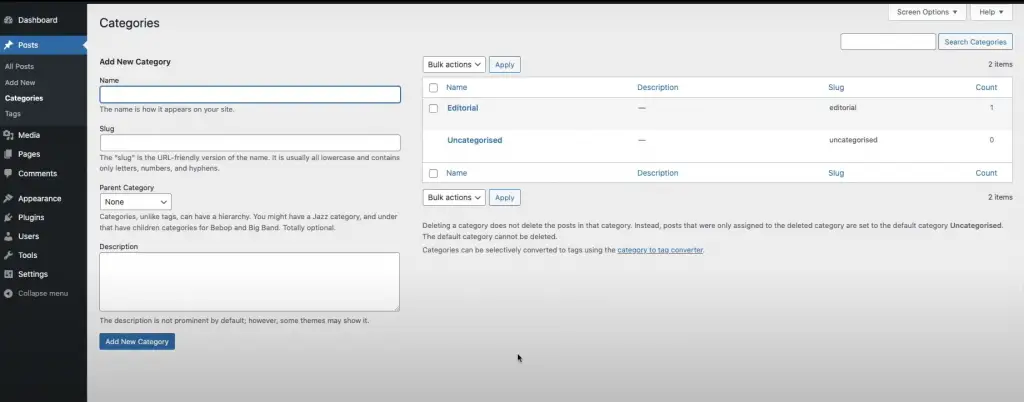
- Go to WordPress Dashboard > Posts > Categories > Add New Category
Add Categories through the Dashboard
- Go to Dashboard.
- Click Post.
- Hover to Categories and click. It will lead you to a page similar below.

4. To add new categories, simply fill out the Add New Category form on the screen. If, say, you want to add a category named “Video,” type it under Name. See example.

5. The Slug is also “Video”.

6. If you would like to place it under a Parent category, you may do so by clicking the dropdown under “Parent Category” and choose the which Parent category it belongs.

7. And then click “Add New Category”.
Creating Subcategories
- To create subcategories, simply fill out the same Add New Category form on the screen.
- Add the subcategory name to the “Name” textbox.
- Add the same name to the “Slug” textbox. As seen in the image below.

4. Click the “Add New Category” button.
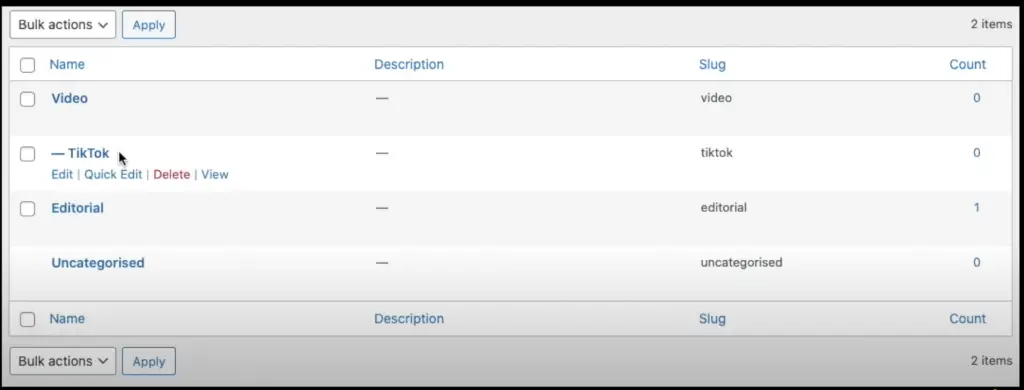
The Subcategory will be shown as below.

As you notice, “TikTok” Subcategory is now under “Video”.
Add Categories through Posts
- Go to Posts.
- Choose any post and then click Edit Post.
- Once inside the editor, you will see the post options on the screen’s right side.

4. To add new categories, clock “Add New Category”.

5. Fill out the “New Category Name” textbox.
6. If this is a subcategory, you may choose the Parent category from the “Parent Category” dropdown. Then click the “Add New Category” button.
7. If the new category is the Parent Category, click the “Add New Category” button.

How to Edit Categories
- Go to Dashboard.
- Click on “Posts.”
- Hover to “Categories” and click. It will lead you again to this page.

4. Go to the Category you want to edit and click “Quick Edit”.
5. You can now edit or rename your category.

6. Click “Update Category”.
How to Delete Categories
- Go to Dashboard.
- Click on “Posts.”
- Hover to Categories and click. It will lead you again to this page.

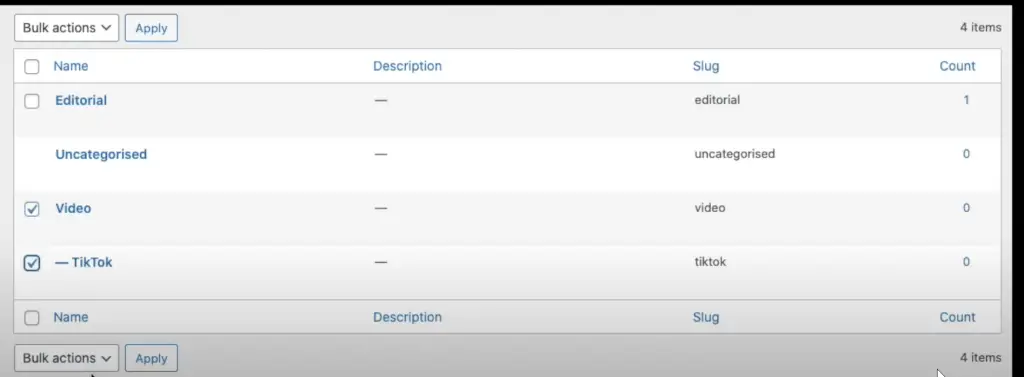
4. Tick the boxes o the ones you want to delete.
5. Go to “Bulk Actions” dropdown on the bottom right and choose “Delete”.
6. Click “Apply”
Conclusion
Hopefully, you have a better understanding of how to organize your content. Implementing categories on WordPress is easy and can be done in just a few minutes. Years ago, WordPress was not this simple to use and we had to use plugins to sort and organize content. With these simple steps, categorization is a lot easier now. Next time you create one of these informational-style blogs, add the category and organize your content to keep them separate and accessible for readers to find in the future.
